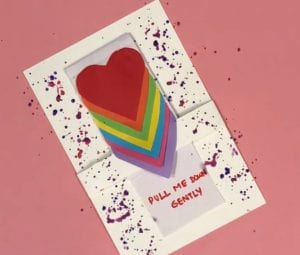
Making a waterfall heart card was one of the major DIY that we were obsessing about for a while. Today we couldn’t wait more and decided to work on this. Let’s figure out the outcome of creating a waterfall heart card.

What you Need:
- Colored Paper
- Scissor
- White Paper
- Scale
- Pencil
- Glue
Step 1
Cut heart shapes out of colored papers. Cut as many heart shapes as you wish to write your messages on.

Step 2
Keep the heart shapes on a white paper and measure the thickness of your heart. Then draw a line a little less than the thickness of your heart and cut it into a strip.

Step 3
Measure about one centimetre on the cut out and fold it one by one.

Step 4
Stick your heart one on top of the other using glue on the folded lines.

Step 5
Take another paper strip and glue the ends to the back of the actual card.

Step 6
Insert the heart strip into the new strip glued to the card and stick it with glue.

Step 7
Decorate the card the way you want to write your messages on the hearts.

Step 8
Now pull your paper down and your waterfall card is ready.

This was absolutely a fun DIY and the result was adorable. We just hope that this Valentine’s Day will be as sweet as this waterfall card DIY.


